How to Edit your images, make it perfect by getting to grips with Google Photos’ intuitive set of editing tools
own editing suite, so you can adjust, touch-up and crop your pics, making them look utterly fantabulous!
Start off by clicking on an image in one of your albums to open it up in its own window, then click on Edit at the top of it. You will now be presented with four main categories running across the top of the window.
The ‘Basic edits’ category features all of the basic editing tools that you need to crop and rotate your image,adjust the exposure and colours, sharpen your picture to make it look ultra-crisp, and resize. The next category, Effects, lets you choose from a wide range of cool filters and effects, some of which are even exclusive to Google Photos. Then there is the Decorate category; if your images feature people, then you will find a great many fun embellishments in this category that allow you to plaster stickers over your images to give them extra personality.
READ:
The final category, Text allows you to type whatever text you want into a window provided and then choose a suitable font before positioning it on your photo. All of these features are easy to use and will help make your pictures perfect with our self google tricks.
Make your photos amazing
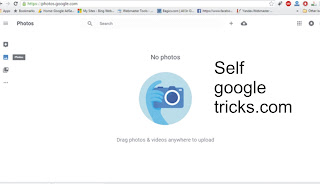
GO TO GOOGLE PHOTOS https://photos.google.com/
1: Auto Enhance: Auto Enhance is enabled by default (you can disable it in your Google+ Settings if you wish) and automatically adjusts the colours of your images. Click on Auto Enhance to see the difference.
2: Start editing: Click on an image in your photos to open it up in its own window and you will see a row of options along the top, including one to rotate it and one called Edit – click on this option to start work.
3: Cropping an image:Click on Crop and then you’ll be able to scale your photo to a particular size or manually move the window around within the image to define what is shown. When you are ready to crop, click on Apply.
4: Altering the exposure:The Exposure option lets you move sliders to adjust the Exposure, Highlights, Shadows and Contrast of the image. You can also click on Auto-Exposure to allow the service to do all the adjustments for you.
5: Balance the colours: Click on Colours, then choose Auto Colours to let Google identify and remove unwanted colour cast. You can also use the Neutral Picker or fine-tune your images using Saturation and Temperature.
6: Sharpen your image: If your image is a little fuzzy, then consider using the Sharpness and Clarity sliders to make it crisper. You can also use Unsharp Mask for finer control over your sharpening to get your image looking radiant
7: Play with effects: Google Photos features a wide range of effects that you can apply to your image. These include camera filters, colour effects and touch-up tools. Click on an effect from the list to preview it with your photo.
8: Add decorations: If you really want to have fun with your photos, click on the Decorate tab at the top of the window and then scroll through a menu of embellishments that you can apply to your image to give it personality.
9: Place text: If you want to caption your images with text, a wide range of fonts are available. Write your text into the box provided, choose a font, click Add and then experiment with the properties of the text.


Post a Comment